WordPress Website Migration
Reading time: 2 minutes
Introduction
Moving your WordPress site to a new host may seem daunting.
Here are some tips and instructions to help streamline the process of transferring your current site to OurWebMastery.com. We will create your website and a temporary domain name on our servers to provide a “Sandbox” in which you can test the new website before going live.
Here is a diagram to help visualize the process.
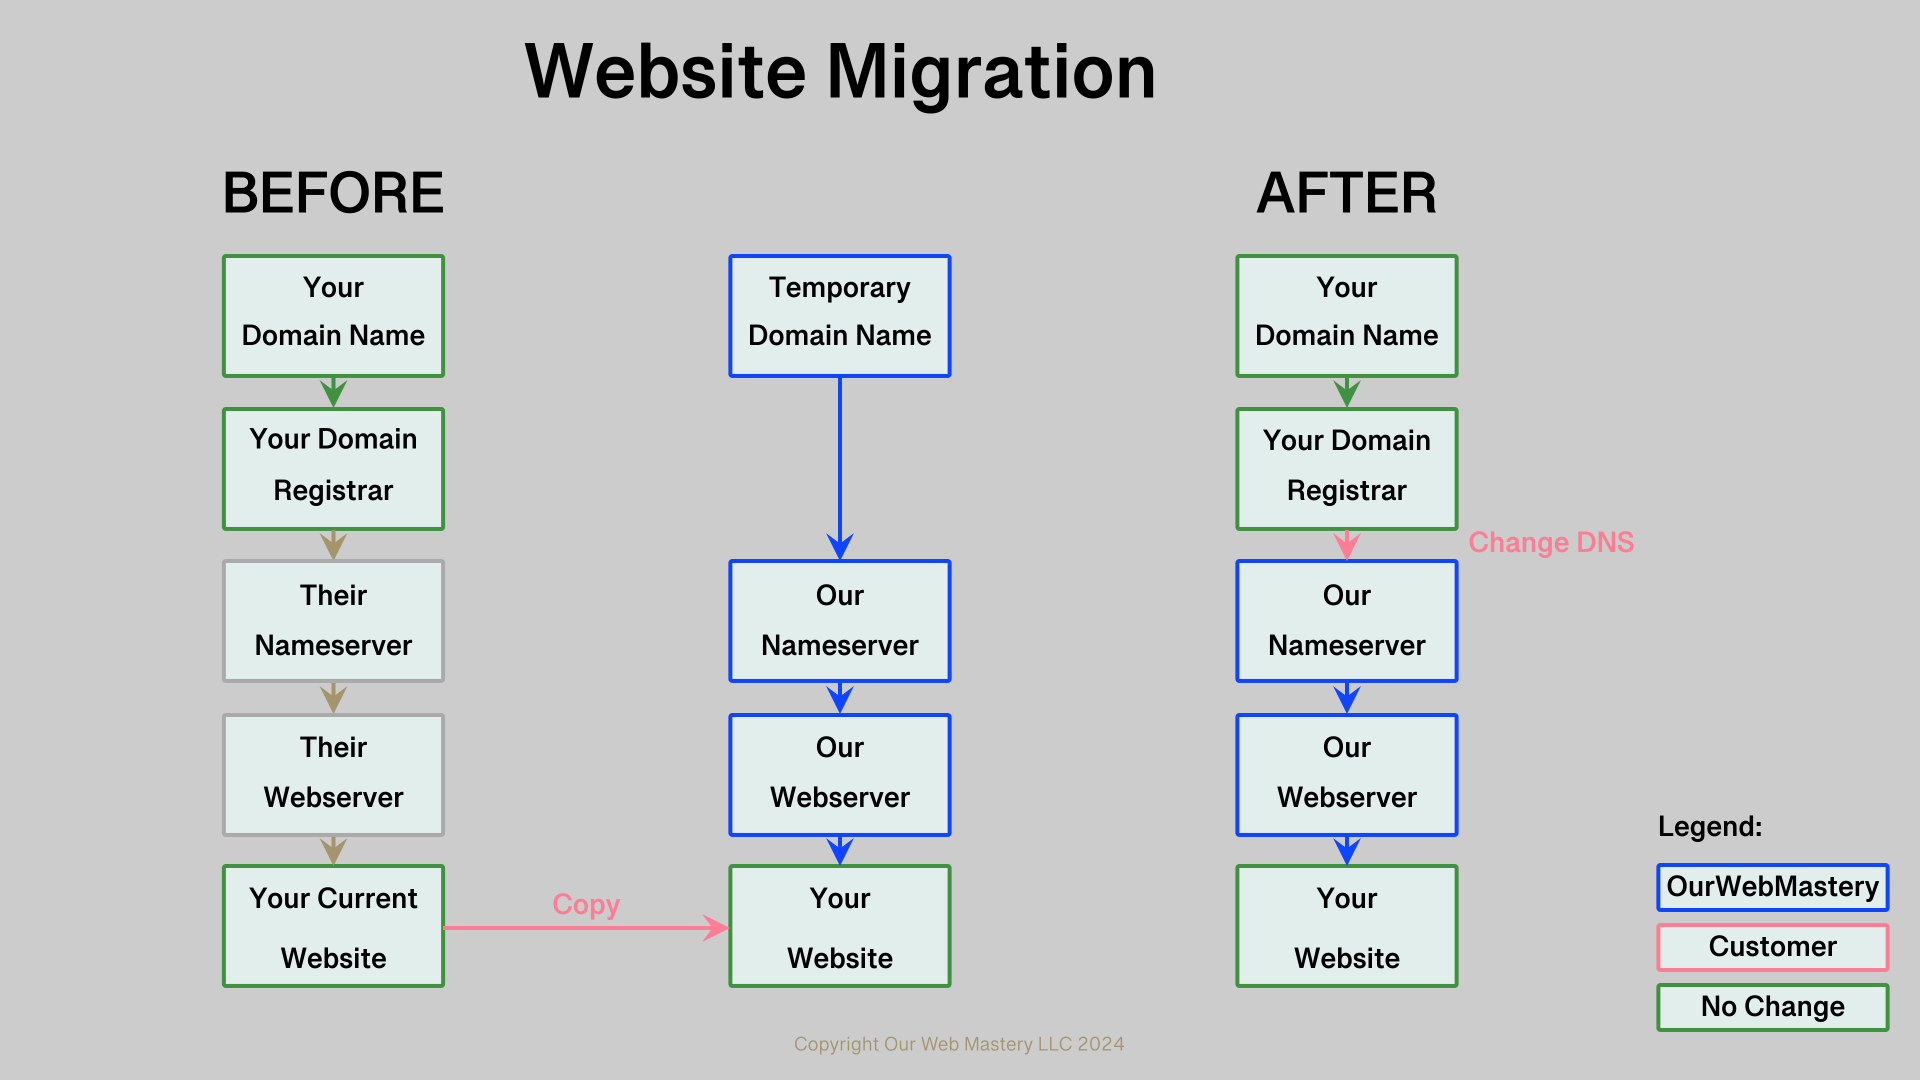
Below are the steps we will follow together to migrate your website to OurWebMastery.com
On Your Marks
As part of the migration process, you will make a copy of your entire website, including the content, pages, themes, plugins, and database.
Step 1: It’s a good idea to clean up your current WordPress site before moving. Removing unused Plugins, Themes, and old content will reduce the data you need to transfer to the new site.
Step 2: We will create a new WordPress installation on our webservers and do the required work to make it accessible via a temporary domain name. The temporary domain name will be a sub-domain to ourwebmastery.com. We will create SSL certificates for this temporary domain name so that access to it will be secure.
Get Set
Step 3: We will send you the temporary domain name and login credentials details. You must change these credentials immediately to your own strong password.
Step 4: It’s a good idea to put your current site into maintenance mode using a plugin, e.g. SeedProd or Light Start. Maintenance mode will stop your website from changing after you have copied it.
Step 5: We highly recommend that you back up your current website using a plugin, e.g. UpdraftPlus or All-in-One WP Migration. Be sure to complete this step.
How to use All-in-One Migration to create a backup,
a) Install and activate the All-in-One WP Migration plugin.
b) All-in-One WP Migration -> Backups -> Create Backup.
Migrate
PLEASE NOTE that migration will copy your login credentials, so you must use those credentials to log in after you import to the new website.
Step 6: You can migrate using a plugin, e.g. All-In-One WP Migration.
a) Log in to your current website as an admin, e.g. https://yourcurrentdomain.com/wp-admin
b) Install and activate the All-in-One WP Migration plugin.
c) All-in-One WP Migration -> Export -> EXPORT TO File or cloud
d) Log in to your new website as an admin, e.g. https://temporarydomain.com/wp-admin
e) Install and activate the All-in-One WP Migration plugin.
f) All-in-One WP Migration -> Import -> IMPORT FROM File or cloud
g) You must re-login with your credentials from your current site since they were copied over the temporary ones we provided.
h) We highly recommend that you change your strong password now.
Step 7: Test and confirm that the new website is functional.
Go Live
Step 8: Go to the website of your Domain Registrar and request a DNS change to point your domain name to OurWebMastery Nameservers. Here are some examples of how to Move to our Domain Name Servers.
Step 9: We will create DNS entries for your domain name and SSL certificates on our servers.
Step 10: You test the live site to confirm the successful migration. Do not delete your old website.
Step 11: You will email us that the migration was successful.
What should I consider when picking a web hosting provider?
Your web hosting provider should,
- be reliable and responsive
- offer fast and secure services
- minimize their impact on the environment
We’re biased, but we think you should choose us (https://OurWebMastery.com). We’d be pleased to serve you and your customers/supporters.